art
Showing posts with label art. Show all posts

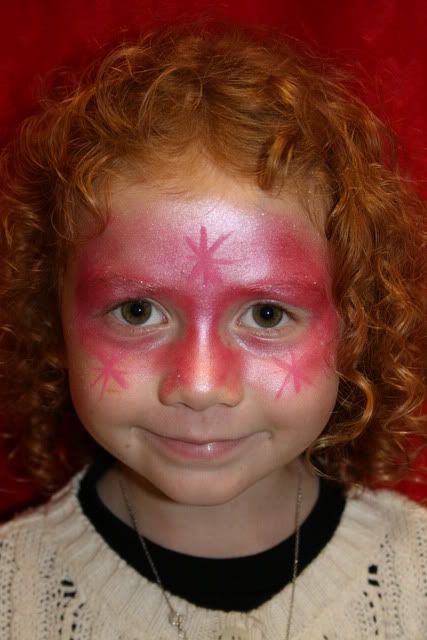
Many Faces Of Face Painting

Posted by Harley Davidson Monday, January 5, 2009 0 comments
Face painting is one of the cherished activities of festivals, carnivals, parades and events across the country. More and more holidays are beginning to use face painting as a great activity for kids. Schools can also incorporate it as a station on their annual field day. Halloween may boast the most face painting out of any holiday, but summer fairs and county festivals run close behind. The designs are too innumerable to count.


A face can be transformed in its entirety, into an animal, character or monster. Face painters often use stencils, which are painted and then stamped onto the face, and can be popular, too. Whatever designs the children, or even adult asks the face painter for, there are a hundred ways to go about getting a great design.

Stencils and stamps are probably the easiest way for beginners to successfully do face painting. The stencils themselves can be cleaned with alcohol or wet wipes between paintings for sanitary reasons. A brush is then used to apply a new color or set of colors for the next child. Different colors can be used for separate parts of the stamp. For example, a butterfly can be outlined in blue and filled in with yellow. The stamp is then pressed against the person's cheek. This is a good way to get the lines just right each time.

Many people who do face painting will do everything with a paint brush. Whiskers, dog eyes, hearts, rainbows and Spider Man are all popular. For the 4th of July, a face could be painted completely with red, white and blue stars. For Easter, decorative eggs, bunny rabbits, flowers and baskets can all easily be painted onto the face. Try hearts for Valentine's Day, or a candy cane face with alternating red and white stripes for a wild, Christmas gathering. People will surprise face painters with creative requests, however. Be prepared to paint just about any character, emblem or color imaginable.

Halloween certainly boasts the biggest number of face painted ghouls, vampires, monsters and more. For the Hulk, one can simply paint their faces green. You can also use a simple Halloween theme, as well. Try bats, a spider web face, or an eerie yellowish tint for a witch's face. Zombies and ghouls can cast sunken features under their eyes and paint blood around their mouths. Of course, the characters don't have to be scary. It's not hard to paint a clown face, with a little patience for painting a giant mouth, or using a solid color to enhance a costume, such as a giant raisin, bear or anything else one can build or find a costume for. Many Halloween costumes will provide directions for adding face painting.

There are also plenty of kits in stores or on the web, which are geared for specific characters, or that come with all the colors for one's own creativity to come out. In general, these paints are a little thicker and harder to remove than the typical face paint used for your everyday festival or event.

Fascination of Mom with Kids Face Painting

Posted by Harley Davidson Friday, November 28, 2008 0 comments
All kids crave attention. Come to think of it, most adults do too. When a child is sitting in the chair, the face painter is completely focused on that child. You can just see how special that child feels at that moment. Any kind of painting is an expression of creativity. When kids choose the design they wish to have painted on their face, they take command of their own creativity and self-expression.


Kids are expected to have the right toys…the right clothes. Generation after generation, youngsters are encouraged to conform to be socially accepted. Face Painting is one way to express individuality.

Let's face it. Having your face painted is just plain fun. And is there any sweeter look than the quick glances that kids take of themselves in the mirror after a face painting session? That little smirk on their face is priceless!

Face painting seemed like an awesome way to entertain my kids on a rainy day. Face Painters make it look so easy. I thought, "I can do that."

I had so many questions, but not a clue where to start. I searched face painting on the internet and although I found some beautiful photos of full face creations, they didn't really help me much as a beginner. I simply wanted to learn how to paint a flower design on my daughter's cheek. I knew, however, that I could learn a lot from the artists who create those kind of masterpieces.

So that's exactly where I chose to begin. I wanted to watch a face painter in action, talk to them, ask questions, dissect their technique. That is a pretty difficult thing to do in the middle of a festival or birthday party, but not if you hire one to come to your house…which is exactly what I did.

Hiring a face painting professional could cost anywhere from $50 to over $200 an hour, depending on where you live. But the information you glean will be invaluable. Here are a few things I learned from my friend, the professional face painter:

1. Do use the right paints. Don't use any paints that are not specifically designed for use on skin.

2. Don't use cheap brushes. Spend at least $3.00 apiece on a few brushes and they will last a long time.

3. Don't try to be all things to all people. It isn't necessary to paint 100 perfect designs. A small collection of 10 or 20 simple designs will make you look like a hero to the children.

4. Do practice as much as you can…on people or on paper. With practice comes speed.

5. Don't be afraid of making a mistake. Children are very forgiving, as is the paint. It's easily 'erasable'.

6. Don't be nervous about fidgety kids. Speak calmly and quietly and they'll usually stay still.

7. Do have fun. Face painting is a therapeutic, creative outlet.

8. Do share your newfound talent. Volunteer your services at events and before you know it, someone may offer to pay you!

Kids Face Painting Fairy Princess Faces

Posted by Harley Davidson Saturday, October 18, 2008 0 comments
Face Painting Fairy Princess Faces by Face Painter Lilly Walters. Ideas for Fairy Princesses from the ebook FACE PAINTING TIPS AND IDEAS


Kids Face Painting Workshop

Posted by Harley Davidson 0 comments
Kids and Children had a creative blast where they were given the chance to experience face painting workshop, a guided lesson on face & body-painting where fellow young participants had a chance on a buddy system, child & parent interactive experience and of course, making and great friends and to show it off. Let's see this video.


Pros and Cons of Halloween Masks - Face Painting

Posted by Harley Davidson Tuesday, October 7, 2008 0 comments
When you walk up and down the aisles of Halloween costumes, you're bound to see a number of masks. Masks are as instrumental in the holiday as candy or pumpkins, but not everyone likes to use them. There are both pros and cons to using Halloween masks, so consider carefully before you plan your next costume.


The Pros

The biggest pro of using a mask for your Halloween costume is that it hides your identity more easily than any other method. This may or may not be important to you! Masks can cover your entire face and head, other just partially cover you, but whenever you alter the shape of your face, you make it more difficult to tell who you are. Painting your face also helps to disguise you, but not as significantly as a mask.

Another good point about masks is that they are easy to use. Painting your face takes some amount of skill and you have to touch up during the night in some cases. Masks just need to be put on, and you're ready to go. Even if you where nothing else, you can simply put on a black outfit and a mask and your costume is set. Because of this, masks can easily be the least expensive costume you can buy.

The Cons

Of course, there are disadvantages to masks as well. First and foremost, masks can be dangerous if you don't wear one properly. The mask should not be able to slip over your eyes and you should be able to breath properly through both your nose and mouth. Try on the mask and make sure that it isn't restricting you at all. When you drive, remove the mask, just to be on the safe side.

Another disadvantage of masks is that they can be rather hot. If you'll be outside and you live in a colder environment, the heat of the mask may not be an issue to you, but if you'll be attending a party where you expect to be crowded into an area with lots of other people, wearing a hot mask can be uncomfortable. Make sure that you don't overheat, removing your mask from time to time when you need to get some fresh air, and always drink plenty of water. In this respect, face painting or not covering your face at all can be a huge advantage.

Lastly, masks can be expensive. Although buying just a mask is a cheap kind of Halloween costume, some of the more detailed masks can be pricey. Remember also that you can make great Halloween costumes for free from your own closet. If you want to where a Halloween mask, make sure that you budget for his additional cost.

Remember, masks don't work for everyone. If you see a particularly great mask but are worried about its comfort or safety, consider wearing it for only a short time. You can also use especially cool masks as decorations in your home! Halloween masks can be great, but only if you use them correctly.

Great Way to Spice Up Your Halloween Festivities

Posted by Harley Davidson 0 comments
Face painting is a great way to complete a Halloween costume that has several advantages over the wearing of masks. One advantage, particularly important to kids out trick or treating. is vision. Halloween masks leave only a couple of small holes to see out of restricting peripheral vision, which can be especially dangerous crossing streets. Masks are also hot, sweaty, and uncomfortable. Most of all, though, face painting is just a lot more fun!


While halloween face painting can be a blast for both children and adults, there are some things you should know before starting a face painting project of your own.

Here are some tips to get you started.


Use only paint designed for use on the face. Preferably water based paint which can be removed with soap and water.


Keep your paint and supplies out of reach of small children. While painting the face of your six year old, your two year old might just be too tempted by the pretty colors.
Avoid putting face paint on cuts, sores. or other problem areas. as this can result in irritation or rashes.

When trying a particular paint or substance for the first time, try testing it on an arm or some other part of the body for a couple days to check for an allergic reaction. This is particularly important for very young children and people with sensitive skin.


Be careful around the eyes. Some face paints will say they are specifically for use near the eyes, but even then, it's a good idea to go sparingly. especially with very young children.

Wash off before going to bed. The longer the paint is left on the skin, the more chance there is of skin irritation, and clogged pores and such. Also, face paint can make a mess of your sheets, and possibly get in the eyes.


Practice. Like anything else, you will be better at face painting your second or third time than you were your first time. So have some fun and maybe have a pre halloween party!

Face painting just seems to naturally go hand in hand with halloween. I believe there is something magical about seeing ones own face altered into an animal, a ghoul, or a fairy princess that children and adults just love. So go out there and have fun, and don't forget to take pictures!


How to Set Up for Face Painting

Posted by Harley Davidson Wednesday, October 1, 2008 0 comments
Face painting is a delightful way to bring smiles to children's and even adults' faces. Using watercolor paints, you can create colorful decorations and patterns on a person's face. All it takes is a bit of patience, a steady hand and the desire to have some fun. It's important to use watercolor paints specifically designed for face painting. Do not use watercolor markers or acrylic paints, as these are hard to remove and can irritate the skin.


Step1 Decide what you want to paint, whether it be butterflies, smiles or hearts. It's important to choose what you are going to do, based on your painting abilities and the amount of time you want to spend on each person's face. If you expect to be doing lots of faces, keep your designs simple and easy to paint, so you can paint quickly. Young children get restless easily, so simple fast designs make it easier for them and you. ....

Step2 Make up a large chart of these designs. This gives you something to show people so they can choose the design they want you to paint. Use larger paper or poster board so people can really see what choices they have.

Step3 Arrange your face paints and brushes. Have a good assortment of watercolor paint brushes, from fine tip to broad tip, so you can easily create your designs. Have two watercolor palettes trays--one to use and the other as a back up in case you run out of a certain color. Always use watercolors specifically designed for face painting.

Step4 Prepare your tools. Keep a large jar of water in which to rinse your brushes regularly. Depending on how many faces you do, plan to change this water frequently so it rinses effectively. Have a damp sponge to erase mistakes, and rinse this frequently to keep it free of paint build-up. Keep a roll of paper towels handy for spills, to dry your brushes and as another way to erase mistakes.

Step5 Practice your designs a few times. Get comfortable with each so you know what brushes and colors you use for each one. This will save you time and indicate if you may need extra amounts of a particular color.

Step6 Practice on fake skin. While this may sound weird, practice on a smooth rubber ball or a balloon, which is very like the texture of skin. Skin tends to "drag" on the brushes as you paint, causing the the brush to "stutter" or spatter paint, which can ruin your design and force you to sponge it off and start again. This practice will help you determine the right paint and water blend for your brushes.

Step7 Garnish your design. For extra pizazz, mix a dab of petroleum jelly and glitter to add sparkle to you work with a brush dedicated just for this. Do not use this near the eyes, as the jelly can "creep" into the eyes via heat or perspiration. Do not use metallic craft glitter. Use only glitters specifically designed for face painting.

Halloween Stenciling and Face Painting Kit

Posted by Harley Davidson 0 comments
Halloween Stenciling and Face Painting Kit


Product DescriptionIncludes: 5 color sticks, 8 stencil sheets, and sponge.
Price: $16.99
Sale: $14.99
You Save: $2.00 (12%)


Spiderman Mask on Kids Faces Painting

Posted by Harley Davidson 0 comments
Here are some tips on how to paint a Spiderman mask on faces for your party in this free video clip! We've done our eye and we're going to add in the red. Now what I'm doing is I'm just doing the spider man mask on half of our model's face, what you would do if you were painting at a birthday party, spider man birthday party or event you might want to do the whole face, but I'm leaving this half blank because ...


I'm just going to go right up to where I did the white eye, its okay if I go over it a little bit because we're going to go back in and outline it. You want to just press gently, you don't need to press hard, and it?ll be uncomfortable for the children. Again relax your face, close your eyes lightly like your sleeping, if you scrunch up I'm going to miss it and spider mans going to look funny.

Almost done, we just have to get around the mouth. Can you look at me please? One thing I actually, I do not like my models to hold mirrors while I'm painting them because it's easier for them to look at me or where I want them to look rather than looking at themselves in the mirror. Just going to go right down since we're only doing half the face, I'm going to go right down the center of his nose and just half of his mouth.

Make sure you get this spot right here, in the nose. It's easy to miss that spot. See how nice that red went on? Nice and smooth, full coverage and then we'll get back in and add the details. That's how you add the red for your spider man mask."

I'm just going to go right up to where I did the white eye, its okay if I go over it a little bit because we're going to go back in and outline it. You want to just press gently, you don't need to press hard, and it?ll be uncomfortable for the children. Again relax your face, close your eyes lightly like your sleeping, if you scrunch up I'm going to miss it and spider mans going to look funny. Almost done, we just have to get around the mouth.

Can you look at me please? One thing I actually, I do not like my models to hold mirrors while I'm painting them because it's easier for them to look at me or where I want them to look rather than looking at themselves in the mirror. Just going to go right down since we're only doing half the face, I'm going to go right down the center of his nose and just half of his mouth. Make sure you get this spot right here, in the nose.

It's easy to miss that spot. See how nice that red went on? Nice and smooth, full coverage and then we'll get back in and add the details. That's how you add the red for your spider man mask."

Add Glitter to a Face Painting Design

Posted by Harley Davidson Friday, September 26, 2008 0 comments
There are several stages to face painting. A final stage involves bringing your creation to life. This is done through adding glitter and shine to the face painting once it is completed to add dimension and pizzaz to your art. Here are the steps to adding glitter to face painting.
Step1 Paint an object or creature on someone's face. Complete the painting adding whatever finishing touches you will need ...

Step2 Prepare the glitter bottle. Buy glitter already in a small plastic bottle that is easy to squeeze. Alternately, buy a travel size shampoo bottle from your local drug store or super center. Choose a bottle with a twist up top like a school glue bottle. Add the glitter to the clean dry bottle with a funnel. Close the lid and set aside.

Step3 Close eyes. The person getting painted should close their eyes and keep them shut while you apply the glitter. Tell him that you will tell him when to open his eyes.

Step4 Hold the glitter bottle pointed at a down angle and squeeze the bottle shooting glitter onto the recipient's face. Start with short quick squeezes. Check to see if enough glitter is on the painting. If you need more glitter, squeeze a second time.

Tiger Face Painting Tutorial

Posted by Harley Davidson Sunday, September 21, 2008 4 comments
This is a tutorial on a simple tiger face design that's great for kids! . Watch Video about :


Face painting on Olympic 2008

Posted by Harley Davidson Friday, September 19, 2008 0 comments

A model shows off Olympic themed face paint. Since July 18, 2008, a face-painting contest on Olympic cheerleaders has been held among students of an art school in Beijing. The results will soon be posted on the Internet for public opinion. The founder of the art school works as a dresser for the opening and closing ceremonies of the upcoming Olympics.

Kids Face Painting Skull

Posted by Harley Davidson Monday, September 15, 2008 1 comments
Hello! today i found this video form Youtube. it is very interest.
This is info form it.


Hey i'm Erica Lynn! I knowww i look horrid without makeup. anyways i started a face painting business called Bubble and Squeak Face Painting. I wouldn't have thought my first video would have been of me face painting but here you go. i thought i would have been doing a makeup tutorial. anyways... have any requests for face painting or makeup..just ask me :DTIPS: make your face more white by adding baby powder to your face, after you put the white face paint. i didn't do that so mine isn't very white :P


Face Painting Designs - Sure Fire Ways to Mess Up

Posted by Harley Davidson 0 comments
You have to avoid these mistakes if you want your face painting designs to have great visual impact.

1. Wrong paint

2. Colors run into each other

3. The base color is streaky

4. Painting dark colors first

5. Detail is too thick and bold

6. Face paint is not sitting well on skin

7. Face paint cracks soon after it dries

Buskerfest and Kids Face Painting

Posted by Harley Davidson 0 comments
One of the photographers that was at Buskerfest just emailed me these really nice pictures of Nefarious’s face paint. There were quite a few people doing it, but these artists had a three-plus hour waiting list! It was definitely worth the wait everyone they did looked amazing. The pictures don’t do it justice.

And I forgot to tell one of my stories from the day. I was watching a great German wheel act, but the woman standing in front of me — in the front row, refusing to sit down even though the act had asked her to — insisted on holding a large fancy and probably very expensive umbrella in my face. I pushed it out of my face a couple times when it got too close, and after the fourth time, she turned around and copped an over-the-top “DO YOU MIND???!” attitude…

I’m like, “yeah, I do mind, you’re in the front row with an umbrella blocking everyone behind you and you keep pushing it into my face!”

So then she starts freaking out, screaming “How dare you talk to a WOMAN that way!??!?” and making a scene that this is some sort of gender issue. I take a step toward her and she keeps freaking out “Are you threatening me? Don’t you know it’s wrong to treat a WOMAN like this?!?” — and I’m just, “Look, just turn around and watch the show and keep your umbrella out of my face.”

So then she starts screaming at her kid, gets them in trouble for nothing, yells about me being an asshole, and drags them off and thankfully I didn’t see them again. (Nefarious was sitting down some distance from me so she was spared the ridiculousness of this drama-queen’s outburst).

3 Face Painting in Under 6 Minutes

Posted by Harley Davidson Saturday, September 13, 2008 0 comments
No Instruction, Just doing the faces from the how to sections. Butterfly, Eye mask, & Tiger. all 3 designs in under 6 minutes. There really are quick and easy!

Very nice video i get it form metacafe.com, share for you.


How to apply face painting to make a dragon face.

Posted by Harley Davidson 0 comments
How to video on how to apply face paints to make a dragon face.


I’m from East Asia , but I know that there are alot of Americans watching my blog, so I thought I’d post this video that Heather from SillyFarm.com did recently for the 4th of July Celebrations in the USA…Enjoy

Please leave comments to share what you thought about the video!
Happy Face Painting,

Kids Face-Painting Designs

Posted by Harley Davidson Friday, September 12, 2008 0 comments
Face painting is one of the most fun things for young children. In a trice, you can pretend to become another creature, assume a new personality. Designs for painting on the face are usually those of animals, flowers or a few human characters.


Face painting can be a great profession and you could paint kids faces for a party or an event. Avoid colours and try out the magic of black and white. Use gold dustings or silver hints at the edges. Face painting should be in sync with the dress. Clown faces are very common and you could be the macho Spiderman or the cat woman.

Be an alien, starfish or the Indian kathakali mask. Being comfortable is important while painting faces. Choose a position for the model and yourself so that you do not strain your back or need to arch your neck strenuously. Perfection happens with practice. Keep a chart ready for models to choose and for starters you could play with water colour effects on the back of the palm. Face painting is for all of us to enjoy and grab the attention.

For children, the simplest face-painting designs are those of a pirate – one big, scary moustache and a black patch over one eye – and you are the fearsome lord of the seas!

Other popular ones include butterflies, rabbits and sunflowers.

Most people just use watercolours for face-painting. But you should remember to be careful while using paint on the face. Some might contain harmful chemicals, which need to be kept away from very small children. Or you might have allergies to paint. It is best to test it on your hand or arm before applying on the face.

You can also make you own face-painting material, using food-colouring, cornstarch and cold cream. They’re more economical and will be washed off easily. Use a sponge or brush while making the design and be careful when painting areas like the eyes and the mouth. A little glitter and coloured gels combined with paint does a very long way. And If you get really good at this, you could even begin your own little enterprise.

Face Painting Stencil Set

Posted by Harley Davidson Saturday, September 6, 2008 0 comments


Face Paints to Finish the Costume Running a face painting booth and need help with the drawing? The Face Painting Stencil Set takes the work out for you. Just use a simple stencil for all your favorite shapes. Stencil set includes eights 4" long and 2 1/2" wide plastic stencil sheets. Instructions included. We have the face painting accessories that you need. Simple and easy use. Perfect for any face painting booth or for anytime fun!

Kids Birthday Party

Posted by Harley Davidson Friday, September 5, 2008 0 comments
One of the most quintessentially "weird" Austin festivals, Eeyore’s Birthday party was first held in 1963, and hasn’t missed a year since. A costume party, festival, fund-raiser and all around good time, this annual event is marked by games and contests, and lots of drumming. Although a hippie-atmosphere prevails, families and lots of children always enjoy the maypole, face painting, and other family-friendly activities. Usually held the last Saturday in April, before the heat of the summer sets in, this is one of the most pleasant and fun experiences, and for many it is a spring time tradition.


Named for the adorably depressive donkey in AA Milne's classic children's book Winnie the Pooh, Eeyore’s Birthday Party began as a celebration of spring for UT English students and faculty, who would set up a Maypole and borrow a live donkey – a tradition that persists to this day. Originally held in the tiny Eastwood Park close to the UT Campus, the celebration’s popularity soared early on, and in 1974 the party moved to Pease Park, where it continues to be held.

As the attendance swelled to the thousands, Austin's Friends of the Forest Foundation got involved, both to provide much needed food and drink concessions to the participants, and to utilize the proceeds to distribute among Austin charities. This humanitarian aspect of the festival, for which admission has always been free, differentiates it from the other commercial festivals, engendering a feeling of longevity and community. The foundation has raised as much as $15,000.00 in one festival, making grants to a diverse number of charitable organizations including the Green Corn Project, Groundworks Music Project, Hearts and Hooves, Hospice Austin, and the Mother's Milk Bank.

The party usually begins mid-morning, and lasts until the sun goes down, and a dedicated children’s area is manned until 4PM. One of the hallmarks of this event is the drum circle, an amorphous group of drummers that constantly expands and ebbs and splinters and regroups during the course of the day. Although costumes are not mandatory, many take the opportunity to don colorful and festive outfits, trimmed with feathers and sequins, with big hats and silly masks. Musicians are invited to bring their acoustic instruments, and groups, both established and spontaneous, entertain throughout the day.

Parking is scarce, so the Friends of the Forest Foundation organizes shuttle service from designated parking lots downtown. No bottles, cans or coolers are allowed, but visitors will find countless food and drink concessions, including Texas beer and BBQ turkey legs. Crafts, commemorative tee-shirts and other curios are also for sale in the kiosks. Eeyore’s Birthday Party is a celebration of spring, but also a celebration f Austin. The things that have made Austin unique – music, food, counter-culture, whimsy – these are the backbone of this long lasting event. This festival has been doing its part to keep Austin weird for over forty years, and will likely continue for 40 more.

Popular Posts

STATS