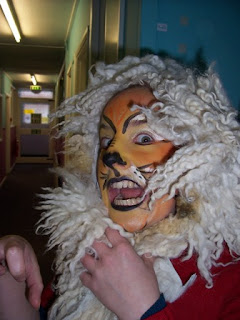
How to Set Up for Face Painting
Wednesday, August 27, 2008
0
comments
 Face painting is a delightful way to bring smiles to children's and even adults' faces. Using watercolor paints, you can create colorful decorations and patterns on a person's face. All it takes is a bit of patience, a steady hand and the desire to have some fun.
It's important to use watercolor paints specifically designed for face painting. Do not use watercolor markers or acrylic paints, as these are hard to remove and can irritate the skin.
Things You’ll Need:
Assorted watercolor brushes
Face Paint watercolor paints or paint palette
Damp sponge
Jar of water
Paper towels
Large bottle of water
Face paint glitter (optional)
Petroleum jelly (optional)
Hand sanitizer (optional)
Assorted watercolor brushes
Face Paint watercolor paints or paint palette
Damp sponge
Jar of water
Paper towels
Large bottle of water
Face paint glitter (optional)
Petroleum jelly (optional)
Hand sanitizer (optional)
Face Painting is Easy and Fun and Do
Step1 Decide what you want to paint, whether it be butterflies, smiles or hearts. It's important to choose what you are going to do, based on your painting abilities and the amount of time you want to spend on each person's face. If you expect to be doing lots of faces, keep your designs simple and easy to paint, so you can paint quickly. Young children get restless easily, so simple fast designs make it easier for them and you.
Step2 Make up a large chart of these designs. This gives you something to show people so they can choose the design they want you to paint. Use larger paper or poster board so people can really see what choices they have.
Step3 Arrange your face paints and brushes. Have a good assortment of watercolor paint brushes, from fine tip to broad tip, so you can easily create your designs. Have two watercolor palettes trays--one to use and the other as a back up in case you run out of a certain color. Always use watercolors specifically designed for face painting.
Step4 Prepare your tools. Keep a large jar of water in which to rinse your brushes regularly. Depending on how many faces you do, plan to change this water frequently so it rinses effectively. Have a damp sponge to erase mistakes, and rinse this frequently to keep it free of paint build-up. Keep a roll of paper towels handy for spills, to dry your brushes and as another way to erase mistakes.
Step5 Practice your designs a few times. Get comfortable with each so you know what brushes and colors you use for each one. This will save you time and indicate if you may need extra amounts of a particular color.
Step6 Practice on fake skin. While this may sound weird, practice on a smooth rubber ball or a balloon, which is very like the texture of skin. Skin tends to "drag" on the brushes as you paint, causing the the brush to "stutter" or spatter paint, which can ruin your design and force you to sponge it off and start again. This practice will help you determine the right paint and water blend for your brushes.
Step7 Garnish your design. For extra pizazz, mix a dab of petroleum jelly and glitter to add sparkle to you work with a brush dedicated just for this. Do not use this near the eyes, as the jelly can "creep" into the eyes via heat or perspiration. Do not use metallic craft glitter. Use only glitters specifically designed for face painting.


0 comments:
Post a Comment